Customer Consulting Group

Power Virtual Agents and Power Automate Better Together

By - Pavlos
23 Mar 2022 05:23 PM
In the previous blog of this series, we started with the basics of Power Virtual Agents and we ended up building our very first bot. This post is building on top of that so if you haven't had the chance to read the post, Getting Started with Microsoft Power Virtual Agents, we highly recommend you have a look before diving in this one. 

In this blog we are going to build a bot that simplifies the requests for annual leave. Our bot "Brian" will ask the user for some basic information such as name, how many days off they are applying for, and for which days. Then our bot will pass that information to Microsoft Power Automate, where we are going to use the Approvals action which will send a request to the HR team to approve or reject the request. 

Let's dive in!

First we need to create a topic and specify trigger phrases (have a look at Part 2). Below you can see that I only have four trigger phrases, but this is more than enough for our scenario. Hover just below the Trigger Phrases and press Add Node:

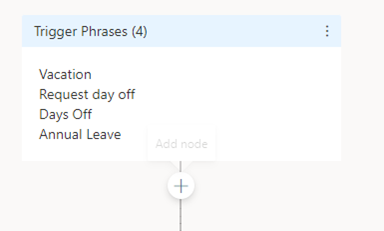
As discussed last time it's a best practice to start with a message. So let's welcome the user and share what type of bot are we. Select Show a message and then introduce your bot (see example below):

Now we are ready to proceed with questions. We can ask the user their name, the number of days they want to take off, and of course the starting date for their annual leave. Hover under the message we just created, and this time select the Ask a question option. You should get the below question template. Now let's start building our question and have a look at a new feature we haven’t yet covered - Variable.

Type your question and under Identify select Person name. The Identify area holds the Entities that the Virtual Agent uses when creating a bot.
Notice that Power Virtual Agent has the ability to store the answers in variables. This is a very useful feature that allows us to use those answers and make the whole bot more interactive and engaging. Click on the pencil and rename the Variable to something more user friendly. 

As you can see below, once we clicked on the pencil the Variable properties panel appeared on the right-hand side of the screen and we renamed the variable to Name.

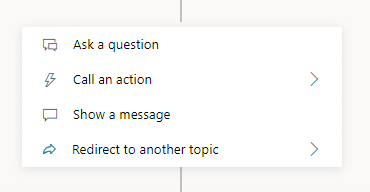
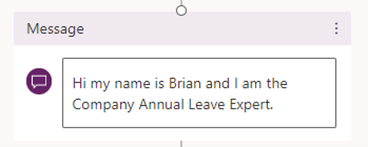
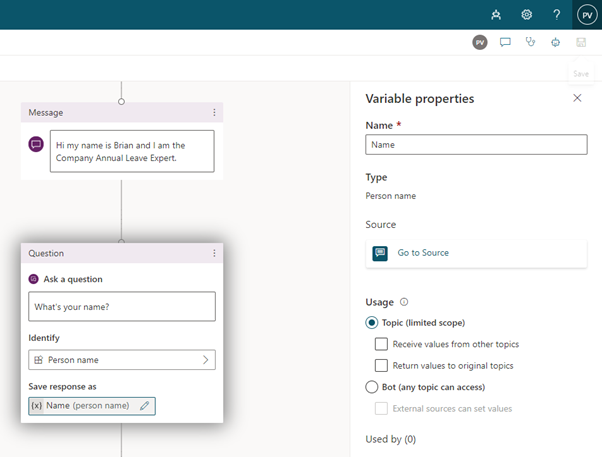
This is how this step should look like after the above edits. 

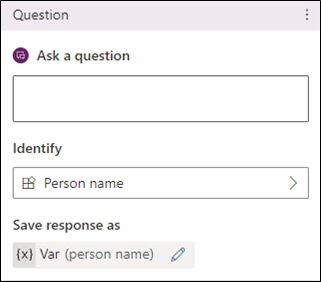
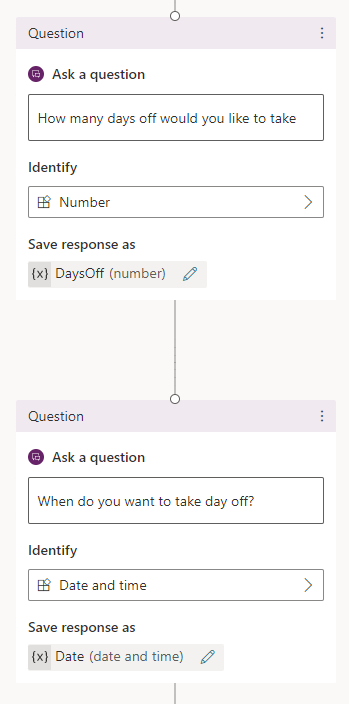
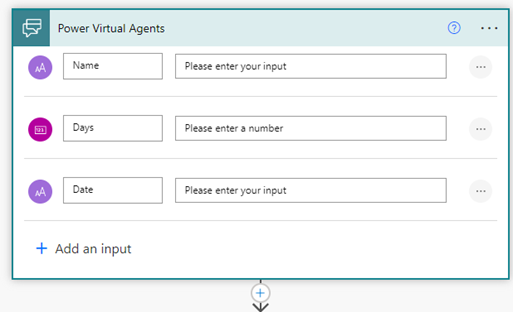
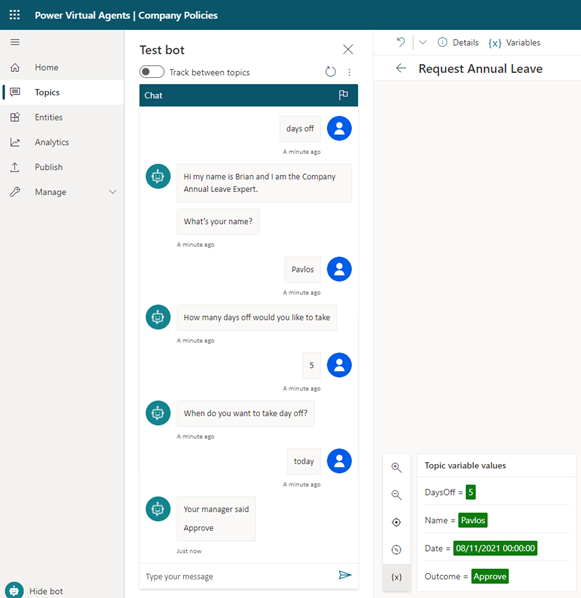
Now repeat the above steps and create a few more questions, one to get the number of days and another to get the starting date. Also, don’t forget to rename your variables to something meaningful. We are going to use them later when building our first Power Automate Flow. Once you are done you should have something similar to the below:

Now that we are ready with the questions, let’s pass them on to our well-trusted Microsoft Power Automate and see how can we leverage the capabilities of Microsoft Power Virtual Agents with flows. You know the drill, add a node under the last question but this time select Call an action

As you can see we have various Flows there we can use, but let's click on Create a flow to build on from scratch. 
When you click on it a separate browser window will pop up and you will be navigated to the Microsoft Power Automate area where will be building our flow. Important here is to understand the Input and Output parameters and how we can use those. 

The Input parameters are placeholders where we are going to pass the data coming from the bot and the output parameters are what we are using to pass the data back to the bot. 

Let's start by creating an Input parameter corresponding to the questions we asked earlier to the user. We have simply here added three Input parameters for Name of the user, Days requested and the Date to start the annual leave. Once ready click on the plus sign and add an action. 

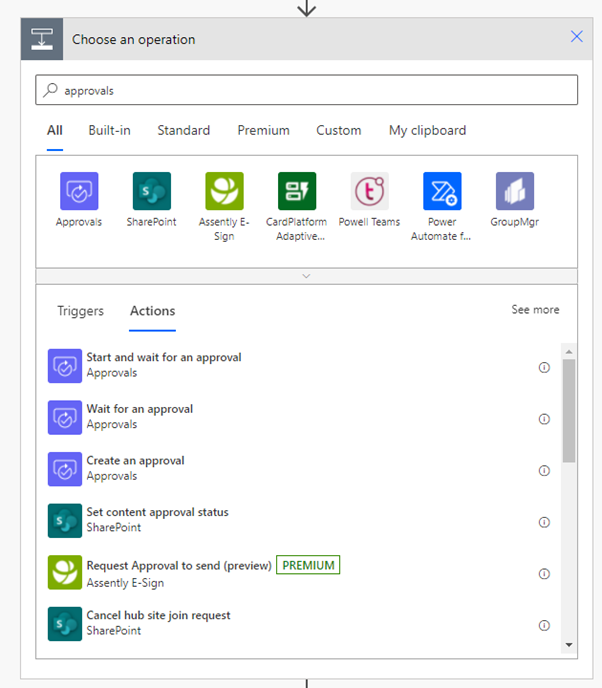
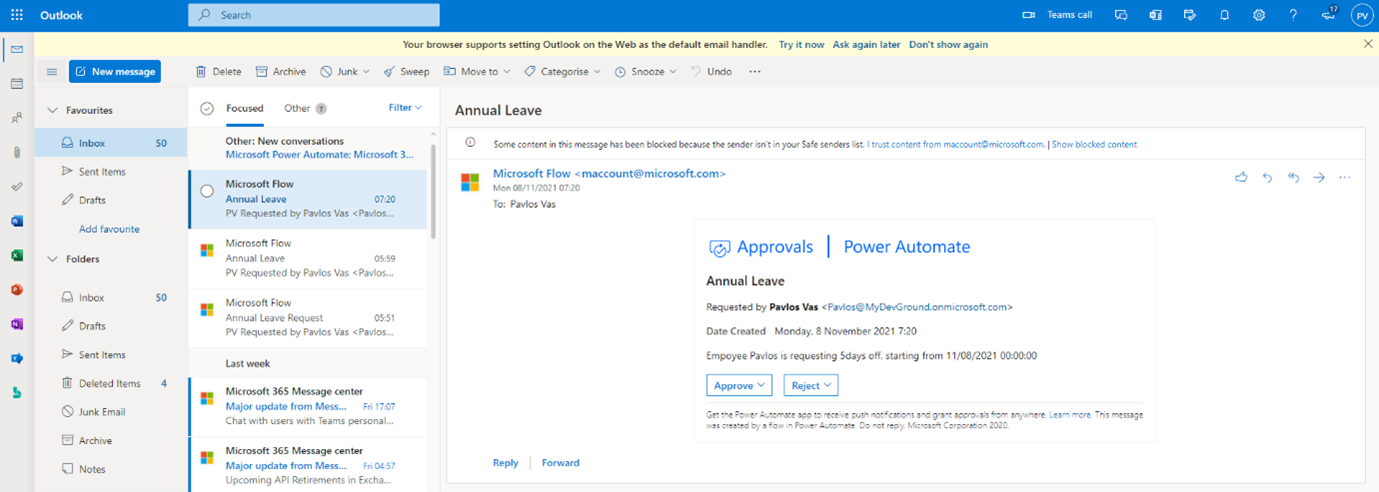
Type Approvals in the search bar and select the Start and Wait for approval action. Approvals is a very popular action and it allows us to create and send approval requests. At the end of the blog you will see how the approval email is structured.

As Approval Type select Approve/Reject - First to respond, for Title we have Annual Leave, but the important ones here are the next two areas. First you want to make sure you populate the Assigned To section. This will define who is responsible for approving this request. Also, another important area to fill is the Details section. It's important to share the information with the approver, making sure they have everything required to make their decision. 

Click in the Details section and start typing your message. Notice that we also used variables from the previous step to make the content more dynamic. 

Once you click on the Details section you will get the same pop-up as you see in the screen below. Simply type your message and when you need to use dynamic data the only thing you have to do is to click on it and it will show up in the details section (just as shown below):

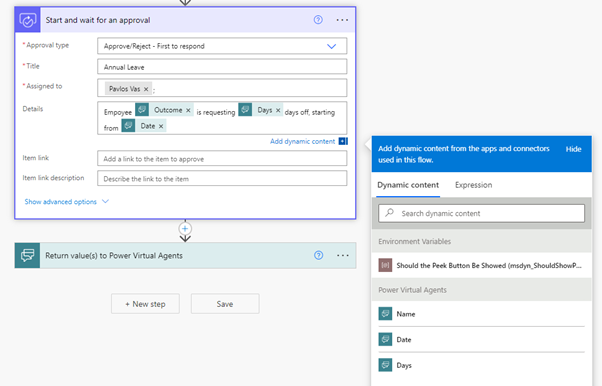
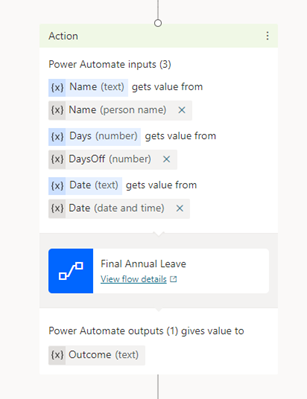
Finally, give your flow a meaningful name and make sure the Outcome is in the Output parameter.

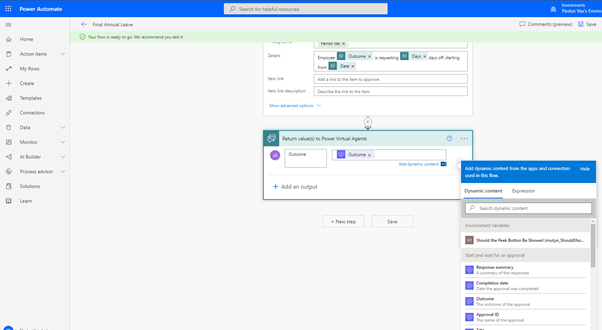
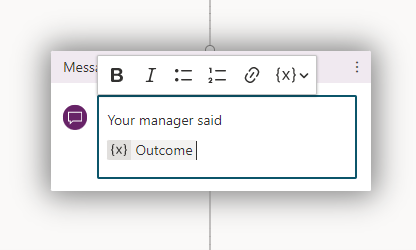
We are almost there. Now that we have the flow we need to map the Input parameters with our variables and create a Message that will return to the user the outcome from the approval. If you followed the steps above, the mapping should look like the below screenshot:

As a last step create a message and click on the Variables. There you can select the Outcome variable which was just returned back from the flow. 

Once this is done we are ready to test the flow. Go to your test bot and write a trigger phrase:

This is how the approval email looks:

Testing the flow we can see that it works nicely and it returns the approval for our day off request bac to the bot.

As a final tip when working with variables remember to always check the Topic Variable Values, which nicely summarises all the values we passed to variables while chatting to the bot.

This is all for today, we hope that you enjoyed the blog. As we are going deeper now and investigate many new areas you will realise that Microsoft Power Virtual Agents is much stronger when combined with Microsoft Power Automate capabilities. Reach out if you have any questions!